Taming the Fire: Propagating Urtica Ardens at Home
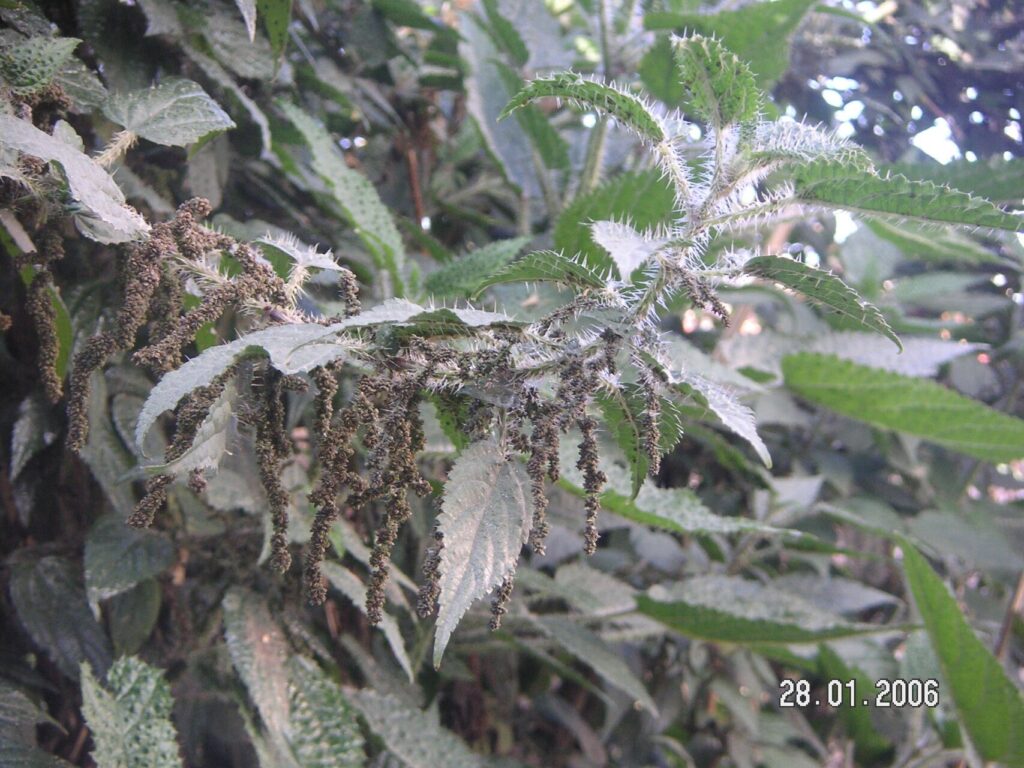
Urtica ardens, also known as the fire nettle, is a striking plant with vibrant green foliage and, as its name suggests, a fiery sting. While its stinging hairs might give you pause, don’t let that deter you from experiencing the joys of cultivating this fascinating species. With the right approach, propagating Urtica ardens can be a rewarding endeavor for both beginner and seasoned gardeners alike.
Understanding the Basics
Before diving into the details, it’s helpful to understand the different methods of propagation. For Urtica ardens, we’ll focus on two primary techniques:
1. Seed Propagation: This method involves sowing seeds and nurturing them into mature plants.
2. Division: This technique involves splitting established plants to create new, independent ones.
Sowing the Seeds of Success
Propagation via seeds allows you to witness the entire life cycle of your Urtica ardens, from tiny seedlings to mature plants. Here’s a step-by-step guide:
- Seed Collection: In the wild, Urtica ardens produces small, inconspicuous seeds. If you’re lucky enough to have access to a mature plant, collect seeds in late summer or early fall.
- Seed Preparation: No special treatment is usually required for Urtica ardens seeds. However, a period of cold stratification (exposing them to cold temperatures for a few weeks) can improve germination rates.
- Sowing: Sow the seeds in a well-draining seed-starting mix, covering them lightly with soil. Keep the soil consistently moist but not waterlogged.
- Germination: Expect germination to occur within 2-4 weeks, depending on the temperature and humidity.
- Transplanting: Once the seedlings have developed a few sets of true leaves, you can transplant them into individual pots or directly into your garden.
Dividing and Conquering
While seed propagation is a rewarding process, dividing existing plants offers a quicker and often more reliable method of expanding your Urtica ardens collection:
- Timing: The ideal time for division is in early spring or fall when the plant is not actively flowering.
- Dividing the Plant: Carefully dig up a healthy Urtica ardens plant, ensuring you get a good portion of the root system. Using a sharp, clean knife or garden shears, divide the plant into smaller sections, making sure each section has a healthy amount of roots and shoots.
- Replanting: Replant the divided sections immediately in well-prepared soil, making sure to water them thoroughly.
Essential Care Tips for Thriving Urtica Ardens
- Soil and Sunlight: Urtica ardens thrives in well-drained soil rich in organic matter. It tolerates a wide range of light conditions but prefers partial shade, especially in hotter climates.
- Watering: While it enjoys moist soil, avoid overwatering as this can lead to root rot. Water deeply and allow the soil to dry slightly between waterings.
- Fertilizing: Fertilize lightly during the growing season using a balanced, organic fertilizer to promote healthy growth.
- Safety First: Always wear gloves and long sleeves when handling Urtica ardens to avoid its stinging hairs.
Enjoying Your Fiery Friends
Propagating and cultivating Urtica ardens, despite its prickly nature, can be a truly satisfying experience. Whether you choose to start from seed or divide existing plants, remember to employ patience and care. With the right approach, you’ll soon have a thriving collection of these unique and beautiful plants. Just remember the gloves!