Let’s Save Some Seeds! A Simple Guide to Harvesting Zinnia Seeds for Next Year’s Blooms!
Hey there, fellow flower lovers! Zinnias – those bright, cheerful blooms that just make you smile, right? Wouldn’t it be amazing to keep that burst of color going year after year, without spending a fortune?
Good news! You absolutely can! Saving your own zinnia seeds is super easy, and it’s like a beautiful little secret for gardeners.
(This post contains affiliate links, meaning I might get a tiny commission if you buy something through them, but it won’t cost you a penny extra!)
While I’m always a little sad to see summer fade, I honestly look forward to this time of year. Harvesting zinnia seeds is one of those wonderfully slow gardening tasks I really savor.
Ready to learn how? Let’s dive in, step by easy step!
Picking the Perfect Blooms to Save
The trick to gorgeous zinnias next year starts with choosing the right blooms to harvest now.
Forget the flowers that are still looking fabulous and fresh – we want the ones that are starting to show a little age.
Keep an eye out for flower heads where the petals are beginning to dry and turn brown. Think of it as the flower telling you, “Hey, the seeds inside are good to go!”.
Personally, I usually let some of my zinnia plants go to seed while I keep clipping others for bouquets. Best of both worlds!
Harvesting Time: It’s Easier Than You Think!
Snip, Snip Hooray!
Once you’ve spotted those ready-to-harvest blooms, grab your snips or pruners.
Hold a small tub or container (I love using recycled containers!) right underneath the flower head as you snip. That way, all those precious little seeds fall right in.
I save so many flower seeds this way!
Let Them Rest
Pop the flower heads into a dry container and let them chill out overnight. This helps them dry out completely, making seed separation even easier.
Seed Detective: Separating Seeds from Heads
Now for the fun part! Time to get those seeds out of their floral hiding places.
Option 1: The Shake-Up. Pop the lid onto your container and give it a good shake! This often loosens the seeds right up.
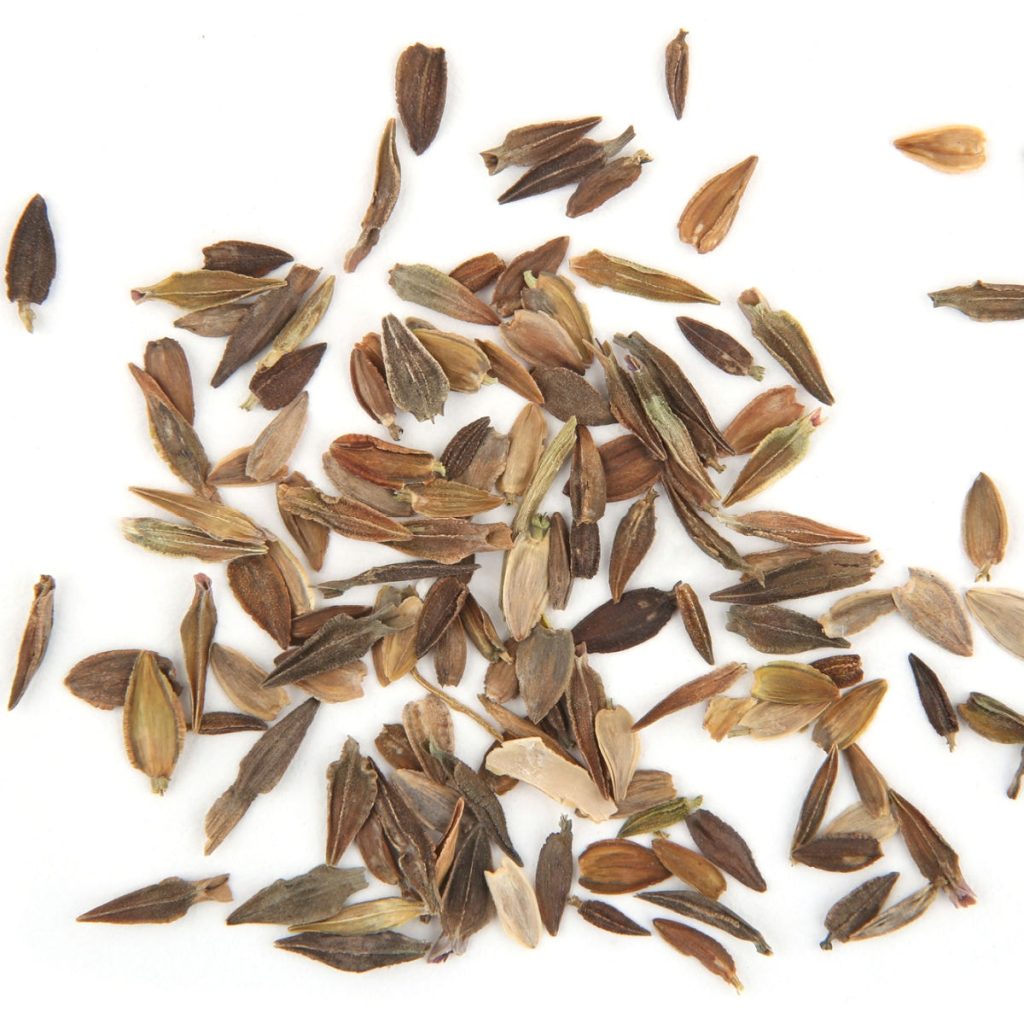
Option 2: The Gentle Rub. Simply rub your hands over the flower head, letting the little black seeds fall into your hand or a bowl below. You can even use your thumbnail to gently tease them apart if needed.
See all those papery petals? Those are called “chaff”. Try to separate those out as much as possible – the good seeds are usually a bit heavier.
Seed Storage 101: Keep ‘Em Safe!
When it comes to storing your saved seeds, think cool, dry, and safe from critters!
I usually pop my seeds into a cardboard box or plastic tub with some of those little desiccant packets (you know, the ones you find in shoe boxes). Then, I tuck it away in my basement or even my office.
Stored properly, your zinnia seeds can stay viable for up to five years!
Springtime Planting: Watch Your Garden Come Alive!
When it’s time to plant, get ready for a riot of color!
You Did It!
Saving zinnia seeds is more than just thrifty – it’s a beautiful way to connect with your garden.
With a little patience (letting those blooms mature) and attention (storing those seeds properly), you can have a burst of zinnia goodness year after year.
So go ahead and give it a try! It’s perfect for beginners and experienced gardeners alike. Just remember to have fun with it!
Important Note: Since your zinnia seeds will be open-pollinated, what you grow from seed may vary a little. Hybrids may not grow exactly like their parent plants, but trust me, they’ll still be beautiful!