Unlocking the Secrets of Micropera Pallida Propagation: A Guide for Orchid Enthusiasts
Micropera pallida, with its delicate blooms and air of exotic mystery, is a true gem in the orchid world. While its beauty captivates, many enthusiasts shy away from cultivating this stunning species due to its reputation for being challenging to propagate. Fear not, fellow orchid lovers! This guide will delve into the secrets of successfully propagating Micropera pallida, empowering you to expand your collection and share the joy of this unique orchid.
Understanding the Basics
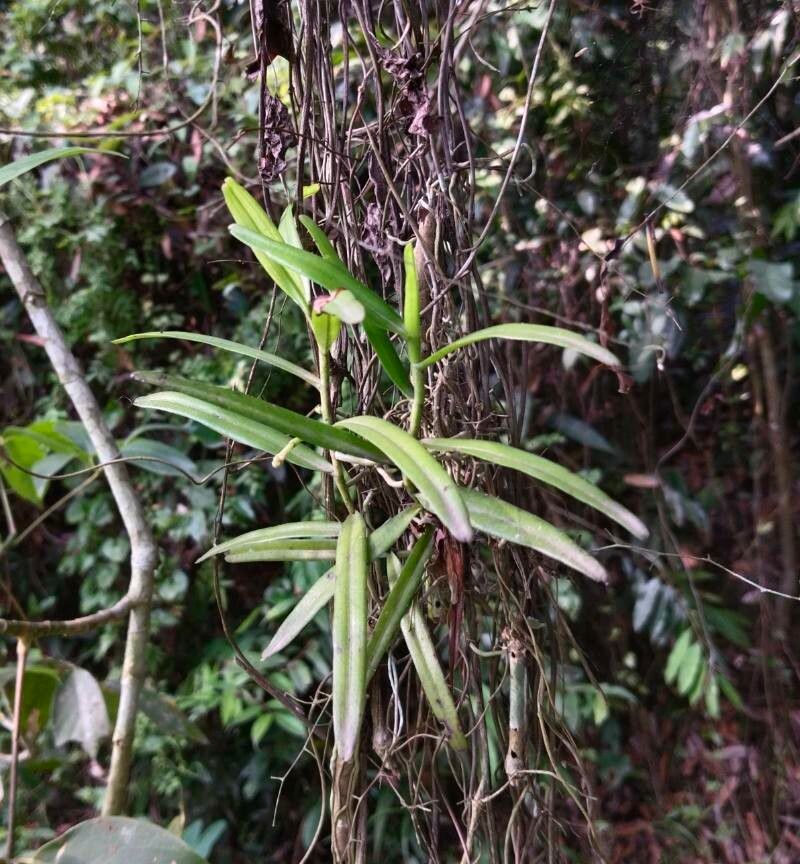
Before embarking on your propagation journey, it’s crucial to understand the basic growth habit of Micropera pallida. This epiphytic orchid, native to Southeast Asia, thrives in warm, humid environments with dappled light. Unlike orchids that produce pseudobulbs for storage, Micropera pallida relies on its thick, fleshy leaves for water and nutrient reserves. This characteristic influences its propagation methods, which differ slightly from traditional techniques.
Propagation Methods
While seed propagation is possible, it’s a lengthy and complex process best left to experienced growers. For hobbyists, two primary methods offer higher success rates:
Keiki Division:
- Micropera pallida occasionally produces keikis, miniature plantlets that develop along the flower stem.
- Once the keiki develops its own roots ( at least 2-3 roots about 2 inches long), it can be carefully separated from the mother plant.
- Use a sterile, sharp cutting tool to detach the keiki, ensuring you include a portion of the stem with the roots.
- Plant the keiki in a well-draining orchid mix, ensuring the base of the plant sits slightly above the media surface.
- Maintain high humidity and provide indirect bright light to encourage growth.
Back Bulb Propagation:
- As Micropera pallida matures, older sections of the plant may lose their leaves, leaving behind a “back bulb” section.
- These seemingly dormant sections can be prompted to sprout new growth.
- Carefully remove the back bulb section from the main plant using sterile tools.
- Place the back bulb horizontally on a bed of moist sphagnum moss.
- Enclose the setup in a clear plastic bag or container to maintain humidity.
- Place in a warm, bright location, avoiding direct sunlight.
- New growth should emerge within a few weeks to months. Once roots develop, the new plantlets can be separated and potted individually.
Tips for Success:
- Patience is key: Orchid propagation, especially for a species like Micropera pallida, is a waiting game. Don’t be discouraged if you don’t see results immediately.
- Maintain sterility: Always use sterilized tools and pots to prevent fungal or bacterial infections that can harm delicate cuttings.
- Create a humid environment: Replicate the humid conditions of their natural habitat by using humidity trays, misting regularly, or investing in a humidifier.
- Provide proper light: While Micropera pallida enjoys bright light, avoid direct sunlight which can scorch its leaves.
Propagating your Micropera pallida is a rewarding experience for any orchid enthusiast. While it requires patience and attention to detail, the joy of witnessing new life emerge from a cutting or back bulb makes the journey truly worthwhile. By following these guidelines and adapting them to your environment, you can enjoy the satisfaction of successfully expanding your orchid collection with this captivating species.