Anthuriums (Anthurium spp.) are a genus of flowering plants native to tropical rainforests in the Americas. Renowned for their long-lasting, heart-shaped flowers (technically modified leaves called spathes), anthuriums come in a dazzling array of colors, from classic red to fiery orange, soft pink, and even deep purple. Depending on the variety, anthuriums can also boast stunning foliage with unique patterns and textures. These tropical charmers add a touch of elegance and vibrancy to any indoor space.
Propagating Possibilities:
There are two main methods for propagating anthuriums at home: division and stem cuttings. While division is suitable for mature plants with multiple pups (baby anthuriums growing at the base), this article will focus on the simpler method of stem cuttings, which can be done even with a single, healthy anthurium plant.
Gathering Your Supplies:
- Sharp pruning shears or secateurs
- Disinfecting solution (rubbing alcohol or bleach diluted with water)
- Rooting hormone (optional)
- Glass jar or vase (for water propagation)
- Well-draining potting mix
- Pot with drainage holes
Choosing Your Cutting:
- Select a healthy stem with at least one or two leaves and a visible node (the bump where a leaf meets the stem). This is where new roots will emerge.
- Ideally, your cutting should be 4-6 inches long.
- Make a clean cut just below a node at a 45-degree angle using your disinfected pruning shears. This angled cut encourages better root growth.
Water or Soil? Deciding Your Propagation Method:
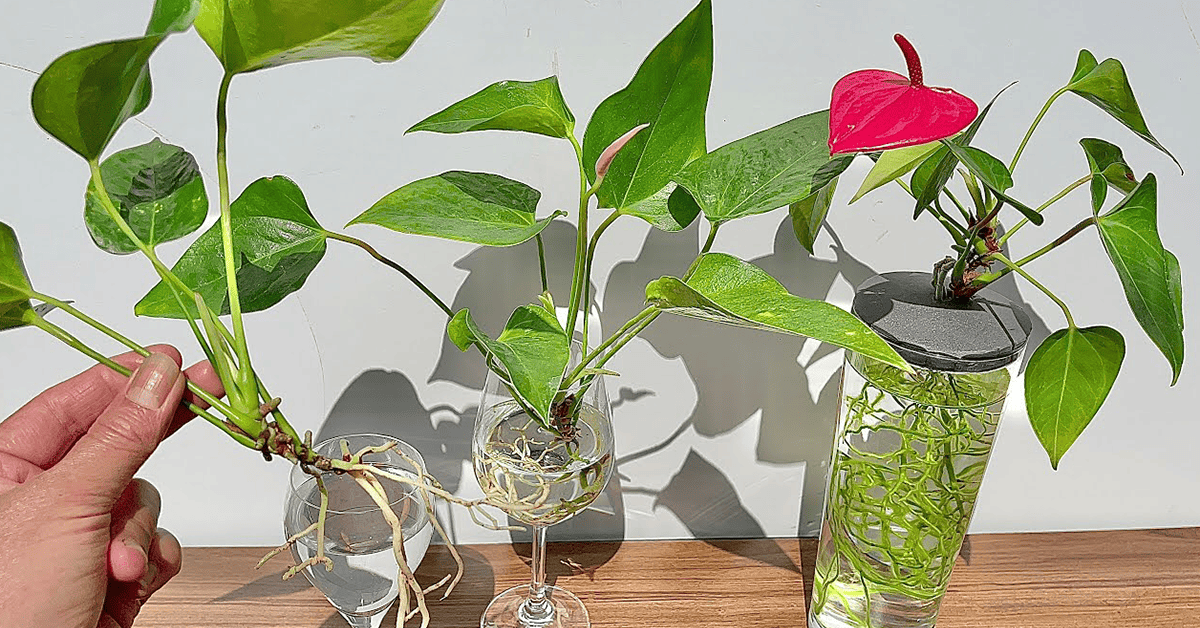
Water Propagation:
- Fill a clean glass jar or vase with fresh, room-temperature water.
- Dip the cut end of the stem in rooting hormone (optional) to promote root development.
- Place the stem cutting in the jar, ensuring the node is submerged in the water, but the leaves remain above the waterline.
- Position the jar in a warm location with bright, indirect sunlight. Avoid direct sunlight, which can heat up the water and stress the cutting.
- Change the water every few days to prevent bacteria growth.
Pro Tip for Water Propagation: For faster root growth, consider adding a few drops of a dilute liquid fertilizer solution to the water every time you change it.
- Fill a pot with drainage holes with a well-draining potting mix specifically formulated for orchids or aroid plants.
- Moisten the potting mix, but avoid making it soggy.
- Dip the cut end of the stem in rooting hormone (optional).
- Plant the cutting in the pot, ensuring the node is buried slightly below the soil surface.
- Water the soil gently to settle it around the cutting.
- Place the pot in a warm location with bright, indirect sunlight.
Anthurium Aftercare:
- Monitor Regularly: Keep an eye on your propagating anthurium, whether in water or soil.
- Water Wisely: For water propagation, watch for roots to form from the node. Once the roots reach about an inch or two in length, you can transplant the cutting to a pot with soil. For soil propagation, maintain consistent moisture but avoid overwatering. Feel the top inch of soil regularly; water when it feels dry to the touch.
- Signs of Success: New leaves emerging from the cutting signify successful rooting.
Tips for Anthurium Propagation Success:
- Use sterilized tools to prevent the spread of bacteria or diseases.
- Patience is key! Rooting can take several weeks, so don’t be discouraged if you don’t see results immediately.
- Provide your propagating anthurium with plenty of bright, indirect sunlight. Avoid harsh or direct sunlight.
- Maintain consistent warmth and humidity, especially for soil propagation. You can use a humidifier or place the pot on a pebble tray filled with water to increase humidity levels.
With a little TLC and these simple steps, you’ll be well on your way to propagating your anthurium and creating a thriving indoor jungle of these tropical